Connecting the Evaluation Board
Before you begin
Make sure you have the following equipment:
External power supply suitable for the Evaluation Board
24 V AC/DC adapter with cable
Ethernet cable
RS-485 USB converter
USB‑C to USB‑A adapter (if your computer only has USB-C ports)
RS‑485 cable with 5‑pin connector
Procedure
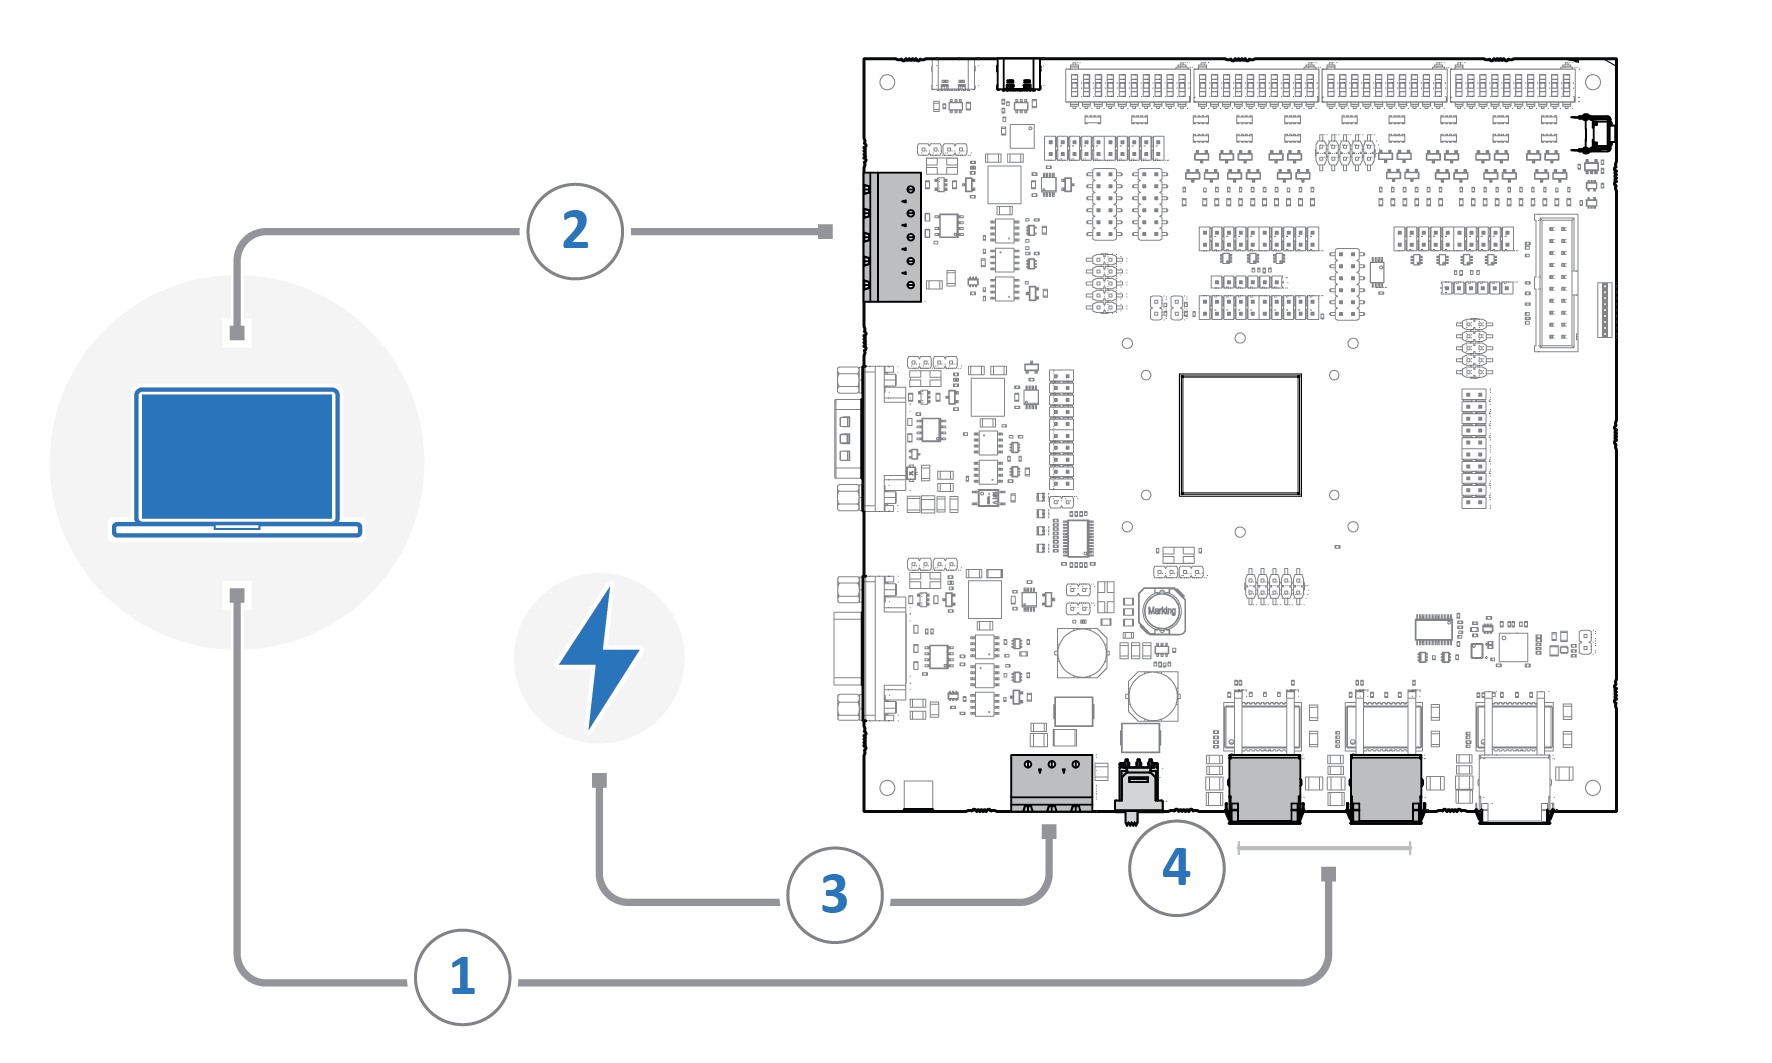 |
Connect and power the Evaluation Board:
Plug the Ethernet cable from either available (1) to your computer.
Note
The Ethernet connection is used to transfer the configuration to the Anybus ONE SoM via WebDAV and to run PROFINET network communication.
Connect the RS‑485 cable from the (2) to your computer using the .
Use the USB-C to USB-A adapter if the computer only features USB-C ports.
Plug the (3) into your power supply.
Turn on the (4).
Note
The ON and OFF markings on the power switch are reversed.
Result
The Evaluation Board is now connected and powered.
To do next
Set up network access for the Evaluation Board. See Set up Evaluation Board network access.